Lawn Care Assistance: Clutch Performance, Repair, and Replacement
April Unruh
ariens electric clutchThe United States Lawn Care industry earned roughly $77 billion of revenue in 2016. From major landscaping jobs on commercial real estate sites to lawn mowing on smaller residential properties, clutch repair and replacement is an essential part of the lawn care sector. 

Ariens electric clutches are some of the most efficient and popular products across the entire landscaping industry. Hopefully this guide will help you better understand the ins and outs of electromagnetic clutches and how important electric clutch repair is for maximum performance. 

Electromagnetic clutches: what are they?

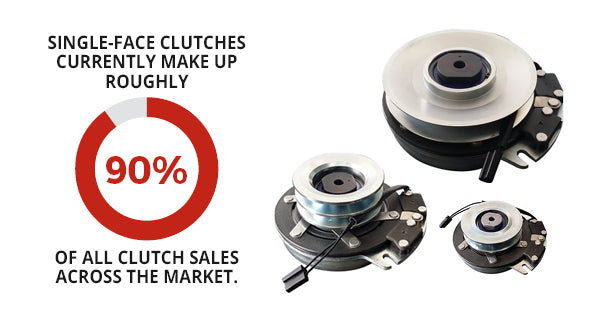
These clutches utilize both electrical and mechanical aspects to fully operate. Overall, the clutches operate electronically but actually transmit torque via mechanical processes. There are a few types of electromagnetic clutches in use across the country, but one design remains supreme: the single-face electromagnetic clutch. In fact, single-face clutches currently make up roughly 90% of all clutch sales across the market. 

Various uses for electromagnetic clutches

There are three main applications for clutches: machinery, automotive, and locomotive. 

  • Clutches applications for machines -- This style of clutch is typically used for copy machines, conveyor drives, packaging equipment, food processing, and factory automation. But the primary machine use for clutches is for lawn mower purposes. Without quality Ariens electric clutches inside lawn mowers, landscaping would be a much more difficult task at any level, both commercial and residential.

  • Clutch applications for automobiles -- Clutches are also commonly used for automobiles, consisting of a clutch release switch inside the gear level. The driver is required to operate the clutch swift by holding the gear level and changing it accordingly.

  • Clutch applications for locomotives -- Electromagnetic clutches are also commonly found in diesel locomotives. In both light and heavy locomotives, power transmission has always been a primary concern. Thankfully, since clutch technology has improved dramatically over the years, these large vehicles are able to operate much more efficiently.

Importance of clutch repair and replacement

Unfortunately, clutches often have a short lifespan if they are utilized on a regular basis. If you're frequently using a high power machine or any kind of lawn mower, you need to make sure you're taking the equipment to trusted clutch repair services. Additionally, if you mower's performance is in need of a significant upgrade, purchasing a replacement clutch is your best bet in order to improve performance and save you money. 

If you're in need of Gravely PTO clutch repair and Gravely PTO clutch replacement, or want to learn more about general clutch repair for Swisher lawn mowers, as well as find high quality Ariens electric clutches, give the professionals at OX Clutch a call today.

Read more →

Burnishing Your New PTO Clutch

April Unruh1 comment

The purpose of burnishing is to allow the two surfaces to become accustomed to each other before high RPM and load is applied while mowing, which increases the torque loading of the clutch. This insures better engagement of the clutch mating surfaces and prolongs clutch life.

To burnish a clutch, reduce the engine speed to about half. A typical burnishing time will take anywhere from 5 to 30 cycles depending upon inertia. The burnishing frequency should be done at 2 to 6 cycles per minute. Frequency of cycles and amount of cycles required will depend upon inertia. Typically the larger the inertia, the fewer cycles per minute allowed, and the fewer overall cycles required.


Read more →

Ten Ways to Ruin an Electric Clutch or Brake

April Unruh
By: JAMES D. KLANN of Stearns Div., Rexnord Corp. | Motion System Design
Mostly, electric clutches and brakes run for hundreds of thousands of cycles with little watching. Overlook a few of their basic needs, however, and these normally unassuming devices can suddenly protest

Though clutches and brakes differ in purpose and application, for troubleshooting and problem-solving purposes their operating principles are similar. We focus here on positive-action units that are either electrically or mechanically actuated (“spring-set”), which includes brakes with On-Off action and Start-Stop clutches.

Most problems in the field show up as overheating, torque loss, or coil failure. Unless you dig until you find the culprit, you’ll probably keep replacing failed parts that result from the problem, without resolving the problem. Here are some tongue-in-cheek guidelines to help you.

Fail to read instructions

It has become a cliché: “When all else fails, read the instructions.” The fact: Clutches and brakes are precision devices with close tolerances. For troublefree service, they may have special assembly, installation, or adjustment requirements you must not overlook. When replacing a unit, even with one that looks the same, don’t just pull the old unit and slap in the new one. Instead, “before all else fails, read the instructions!”

Likewise, some sizes or designs have procedures for adjusting the air gap as it increases because of wear, or procedures for replacing components as they exceed wear limits. If you fail to follow all the maintenance and adjustment procedures in the instructions, you may not ruin your clutch or brake immediately, but you can be sure you’ve shortened its life.

Misalign it

Most electric brakes and clutches are installed in a direct-drive configuration, and alignment is just as important as it is with a motor. If bearings and shafts are not aligned, extra stresses and vibrations that develop can turn into major problems. Most industrial clutches and brakes are similar in design and have a small air gap between armature and magnet body. The effect of any misalignment is magnified, particularly on clutches, and can cause vibration and torque loss.

When you install or replace clutches or brakes, be aware that there are NEMA specifications on how they fit to motors or gearboxes, governing tolerance ranges for things such as register and bolt circles. Brake and clutch manufacturers set their design criteria to be compatible with this “window,” and proper alignment is normally the equipment manufacturer’s responsibility. You can incur trouble when mounting a new brake or clutch on used equipment if you don’t assure that motors or drives remain within NEMA tolerances. If the motor end bearings are worn, any shaft wobble will be exaggerated farther from the motor where the clutch or brake may be mounted — and what is really a motor problem may first show up as clutch or brake failure.

To avoid trouble, measure shaft runout both axially and radially, and check it against NEMA tolerances. These are usually around 0.004 in. radially and 0.002 in. axially, but they vary some by motor size. Also, check motor-shaft end float. Most equipment can tolerate float up to about 0.020 in. Most manufacturers’ instruction sheets include allowable indicator runouts for mating equipment.

Overhung loads can cause trouble. Particularly on clutch applications with a sprocket or sheave, there is a limit to the side force or tension you can apply without overloading the bearing and deflecting the output shaft.

If a unit has a retaining bracket, don’t bolt it down tightly or weld it in place unless you want premature failure. The retaining tab is mainly to prevent rotation when the clutch is applied, and it is necessary only to pin it in place so it is somewhat free-floating. Bolting it tightly can create hub-and-shaft misalignment and bearing prestress. This can lead to quick clutch failure and even drive damage.

Misassemble it

Electromagnetic clutch with integral roller chain sprocket in typically tough duty. “Roto- Sprocket” mounts in underpart of ice-cream-bar wrapping machine. It positions product.

We’re back at “read the instructions,” but repair or replacement of a clutch or brake presents many opportunities for misassembly.

Setscrews are a simple but often-overlooked example, if calls from the field are an indication. You’ll find them on driven hubs of components that mount to motor shafts. Depending on component size, components may be keyed only or keyed and secured by setscrews, especially on larger units. Fail to read about them on the instruction sheet if you want failure in the future.

Some brakes and clutches come with features such as special sealing and plated components for washdown applications, such as those in the food industry. Replacing plated fasteners or other components with unplated items will accelerate rust and cause early failure. Finally, replacing components such as friction discs with nonoriginal parts may drastically change operating characteristics. Use components not designed and tested with your specific brake or clutch and you may compromise performance. A replacement friction disc may look like and fit like the original, but it could have a much different friction coefficient and shorter life, for example.

Shake and break

Two types of vibration can trouble your clutch or brake. Operating vibrations from uneven loads, poor alignment, or misassembly will obviously destroy a unit if left unchecked. These phenomena are often cumulative, growing larger as they cause wear or loosen mountings. More subtle are environmental vibrations, caused by other adjacent or mobile equipment. Particularly when machinery having clutches or brakes with ball or roller bearings is stored or inactive for a long time, these vibrations and the bearings’ static loads may cause “false brinelling.” Result: Tiny dents in the bearing raceway. They will cause vibration and wear as rolling elements pass over them when the clutch goes back in service. The easy solution: Periodically turn the shafts on which the units mount — maybe once a month. It can improve the health of motor and line-shaft bearings, too.

Forget about storage

For a really bewildering and embarrassing experience, neglect any care of clutch and brake units waiting to replace spent compatriots or to go on your new products. A poorly protected clutch or brake waiting in the tool crib or storage room can get hurt. Avoid on-shelf vibration. Also, a well sealed and stored clutch or brake can be kept indefinitely. Normal factory packaging should be enough for about three months’ storage in an area without environmental control. For longer storage, a unit should be sealed in an airtight container with a desiccant to entrap moisture that may remain in the package, thus preventing rust. Superficial rust won’t hurt operation, but if rust is heavy enough to cause some armature deterioration, it can cause uneven pull and reduce the unit’s torque. Also if, because of rust particles, the unit does not seat properly, it could drag and generate excess heat.

Give it the wrong voltage

Torque depends on the coefficient of friction of the plates and also on the amount of pull force between the armature plate itself and the magnet body and coil assembly. Pull is a function of the coil’s specific voltage rating. Decreasing coil voltage reduces clutch torque so, where full torque is required, be sure full rated line voltage is supplied. When reduced torque is necessary, you can control a unit by means of an adjustablevoltage rectifier for the coils.

A more damaging mistake than applying the wrong value of voltage, though an easy one to make, is to apply ac voltage across a dc coil. Though most brake and clutch coils operate on dc, the manufacturer can supply them with a rectifier that lets them use ac line input. In some applications, a dc coil may operate (inefficiently) on ac for a short time before it fails. That can throw troubleshooting efforts off the track by making the failure look like an equipment fault.

Size it wrong

This misguideline applies less to the original equipment designer; more to the equipment repair specialist; and even more to the equipment redesigner and rebuilder. They can meet problems when a clutch or brake is replaced or when the equipment on which it serves is used for an application that differs from its original.

If the unit is too small for the torque requirement, it may work for a while before exceeding thermal capacity. Though the problem may seem like simple component failure, look further if a clutch or brake appears to lack thermal capacity. If it can’t dissipate heat quickly enough, you may need a larger unit. A solution may require close cooperation among makers of the equipment and of the brake or clutch, as well as the user.

You can also drive a brake or clutch beyond thermal capacity by failing to size it for high cycling. And heat buildup caused by any combination of high inertial load, rapid operation, and friction may be compounded by high ambient temperature. Make no mistake: Failure will result if the unit’s thermal capacity is exceeded.

Burnish badly

Most units are designed to burnish or run-in quickly in normal running. Others may be factory preburnished or available with optional preburnishing. Unless clutches and brakes are burnished properly, they may not deliver rated torque.

On standard brakes and clutches, inner and outer poles may extend a few thousandths of an inch past the frictionlining surface. This is normal, and the excess material will generally wear down properly after a short period of normal use. However, take care on lowspeed applications. If a clutch is burnished at low speed, say 200 rpm instead of 1,800 rpm, and the armature is not hardened, it could gall or “tear.” If the clutch or brake is not properly burnished, the friction material may not seat properly, and then the unit will never deliver rated torque.

When a brake is used on a PC or PLCcontrolled application, the load may be electronically driven to a stop before a brake sets, so it sets at zero speed and does not burnish at all. Many adjustablespeed motor drives have dynamic braking in which, during a slowdown or stop, the motor becomes a generator, putting power back into the utility lines. The “generator” load itself acts as a brake.

Use a friction clutch as a slip clutch

Friction clutches described here are not designed to slip or “feather” a load as does a slip clutch, which is intended for soft starting or downline equipment protection. Instead, they are designed to produce the minimum torque needed to keep the input and output shaft locked together in On-Off fashion. The more they slip, the faster they wear and the more heat they produce, because of the excess friction. Avoid this by sizing the unit for maximum torque needed to drive the output. Then apply a service factor, generally 1.5 to 2, or maybe even 3, depending on the application.

Forget the work environment

When lubricant or other material that can change the friction coefficient gets between friction surfaces, up to 75% of torque can be lost. It’s easy to notice large-volume contaminants — big gobs or clumps — but some are more subtle, such as lubricant from a chain drive. Near equipment that gives off contaminants, install a brake or clutch shroud.

Environmental and service conditions that can cause trouble for brakes and clutches include exposure to:

• Wetness or dampness, like steam.
• Gritty dust, like grinding fines.
• Oil mist.
• Salty air.
• Radioactivity.
• Chemical fumes.

Also, poor ventilation for a brake or clutch can raise its temperature and bring on trouble. If the unit is overshrouded or crammed into a tight cabinet, for example, it may suffer needlessly.

Another caution is the opposite of what you might expect: In early operation, do not blow out excess dust that accumulates. It helps maintain the right torque and improve any necessary burnishing. Sometimes you can be too clean.

Don’t recheck before you call

Often, you can blow a simple oversight into a much bigger production. In one case, a noise problem on some equipment brought a call to the clutch manufacturer. After a service call involving several people and many hours of downtime, the problem was traced to the installer’s failure to tighten setscrews — as described in the instruction sheet. By one estimate, 20% of trouble calls could be avoided by just reviewing instructions.

If you really want such problems, of course, misfile the instructions. Better yet, have no file for such items. Make sure they get lost or scrapped quickly, preferably even before installing the unit or storing it. For special fun, throw away the packaging before storing so you can’t tell readily what unit you have.

James D. Klann is Field Service Manager, Stearns Div., Rexnord Corp., Milwaukee.

Read more →

How To Test a PTO Clutch

April Unruh

By Chris Stevenson

Testing the PTO clutch should be done with caution, using proper safety steps.

The power takeoff clutch, or PTO, on a small engine uses electricity to engage a clutch to the main engine crankshaft. PTO clutches transfer rotational torque and power, typically used on small tractors to activate mower blades or tillers. The battery sends voltage to a magnetic armature and rotor, which engages the clutch and plate, allowing full contact. Problems arise when the clutch jams solid, slips excessively or the voltage becomes lost. A tractor owner can initiate a few tests to see if his PTO clutch functions properly, engaging and disengaging at the proper time.

Lift the utility vehicle up with a floor jack. Place two jack stands under the front frame and two jack stands under the rear frame, so the wheels sit above the pavement. Provide enough clearance to look under the mower deck and see the clutch drive assembly. Refer to your owner's manual for the battery location. Some riding seats tilt up for battery access. Place the positive lead of a voltmeter on the red, positive post on the battery.

Place the negative voltmeter lead on a good engine source. Read the volts. If the battery output indicates 12.5 volts or below, charge the battery. The PTO clutch will not engage without sufficient voltage.

Look for the in-line fuse between the electrical wiring harness from the lever switch to the PTO clutch assembly under the deck. Unscrew the cap wires to the fuse and look at the fuse filament. If the fuse appears black or the filament has blown, replace the fuse with the same ampere rating as the original.

Start the engine and let it warm up. Activate the lever to engage the clutch. From a distance, look underneath the deck and check for mower blade operation. If you hear a squealing noise, shut the engine off and remove the ignition key. Disconnect the negative battery cable with a socket.

Slide under the mower deck and remove any broken branches, twigs or other obstacles that might have jammed between the pulley and drive belt. Check the belt for tension by engaging the lever and feeling the tension on the belt. Replace any frayed, cut or worn drive pulley belts. Make the sure the idler pulley moves freely back and forth on its swivel.

Reconnect the negative battery cable with a socket. Insert the ignition key. Start the engine. Activate the PTO engagement lever, then disengage it. Turn it on and off several times. If you do not hear a disengagement noise or see the power takeoff pulley stopping or slowing down at any time, it indicates the clutch and plates have galled together from excessive heat, or the slip ring has jammed. This will necessitate a clutch removal and internal inspection.

Pull off the main power wire that goes to the PTO clutch assembly. This is located on the clutch side. Turn the wire jack toward you, but pull yourself back away from the deck as far as possible. With the battery connected and engine turned off, place the negative alligator lead of a test light to a ground source. Place the probe of the test light inside the wire connector, attaching it to the red lead that leads to the PTO clutch.

Activate the PTO clutch lever and look for the bulb to illuminate from the test light. No illumination means the engagement switch has failed at the lever-switch position. If the battery voltage reads correctly and the in-line fuse checks out, the lever switch will be the problem.

Use wire strippers to cut a length of jumper wire that will reach from the positive post on the battery to the red power lead inside the PTO wire jack. Make sure you connect the battery cables. Connect one end of the jumper wire to the positive side of the battery and the other end to the positive, red wire inside the PTO wire jack.

Listen for the click of engagement. If you can hear nothing, the problem lies within the electrical circuit of the PTO clutch assembly, most likely at the rotor and armature location.

Tips & Warnings

  • Be very careful when running the engine and engaging the clutch for testing purposes. The clutch will spin the mower blades, and you do not want your head or hair anywhere near the underside of the mower deck. Observe from a distance, or summon the help of an assistant to turn your key and clutch engagement lever on, while you watch clutch operation.

---------------------------------------------------------------------------

In the market for a new clutch?

    Browse our collection of high-quality, industrial-grade Ox clutches. Our products offer long-lasting durability, efficiency and safety—at a fraction of the cost!

    Contact us today!

    Read more →

    Welcome to Ox Clutch

    April Unruh

    Welcome to the Ox Clutch forum! Here you can find and exchange ideas, questions, solutions, news and tips. It’s easy to use, you don’t need to sign up to read or post, so make sure to check back often for updates.

    Read more →